The exhaust system on all Cors-Air engines is unique and was designed to prevent exhaust problems.
Like on no other engine, the exhaust system is fastened in such a way that it vibrates and very efficiently dissipates the detrimental vibrations. All the system is fastened to the engine and not to the frame.
The exhaust vibrates together with the engine and in the same time, the flexible points it has on it, let it resonate within itself.
The principle is based on a ball joint between the exhaust manifold and the tuned pipe (present on other brands as well) and additionally, the tuned pipe together with the muffler are elastically fastened to the engine via two rubber mounts inserted between two brackets.
Another flexible point is between the tuned pipe and the muffle's upper flange as we shall see below.
Now, we will show step by step how to assemble the exhaust brackets:
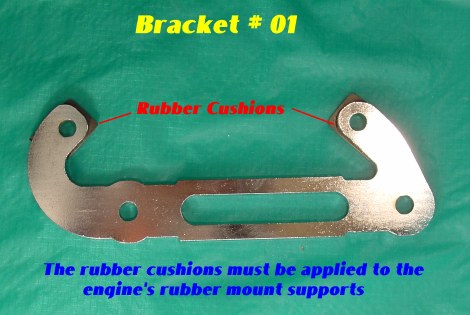
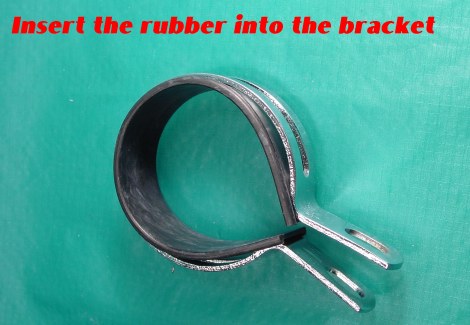
The picture above represents bracket # 01 which is attached to the RIGHT side of the engine's rubber mount screws.
The black or sometimes red colored rubber (shown above) must touch the engine's mounting points. The rubber will additionally absorb vibrations.
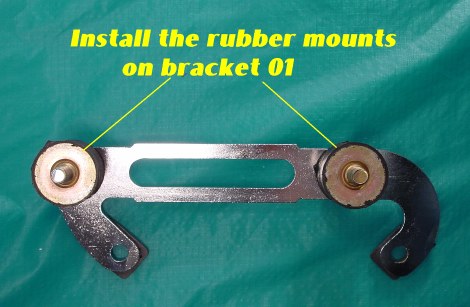
In the picture below, we present how the two rubber mounts are installed on the bracket:
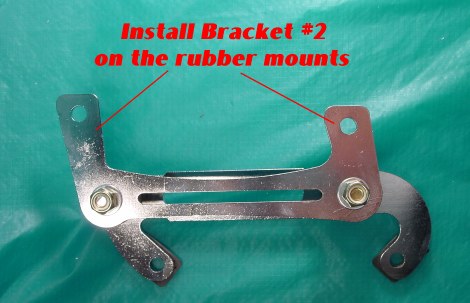
Next, we install bracket #2 on the rubber mounts and fasten the bolts with Teflon inserts. Please do not overtorque the nuts since they can turn the rubber on the mounts and put tension on them.
This, in time may cause a premature wear of the rubber. The best way to tension the bolts is to hold the rubber mount's body wrapped with a green scoring pad to provide additional friction and grip.
Do NOT use pliers to hold the rubber mount because damage to the rubber may occur.
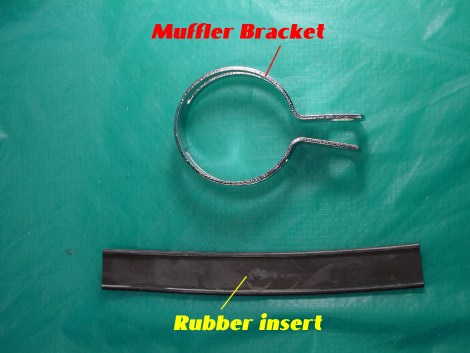
In the next step, we prepare the round muffler brackets.
As seen below, the brackets have rubber padding that must be inserted between the muffler and brackets.
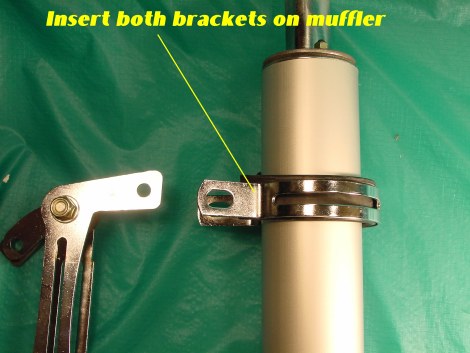
Now we can slide the two muffler brackets on the muffler's external body.
Please make sure the rubber inserts remain in place.
The brackets need to be moved up or down to align them with the flat brackets (with the rubber mounts on them)
Also, the muffler should be high enough to receive the tuned pipe fully inserted into the flange. If the tuned pipe is not pushed deep enough into the muffler's flange, it may slide out in flight causing a possible prop strike!
If the end of the tuned pipe is fully inserted in the muffler's flange, there is 100% guarantee that it will never come out.
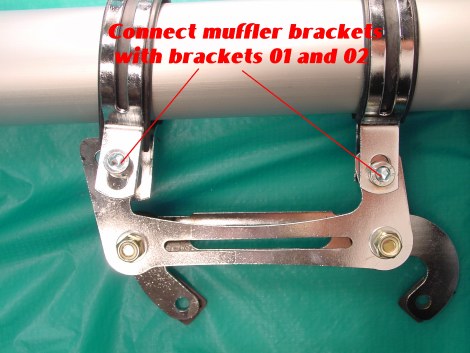
The picture below shows the brackets and the muffler correctly connected.
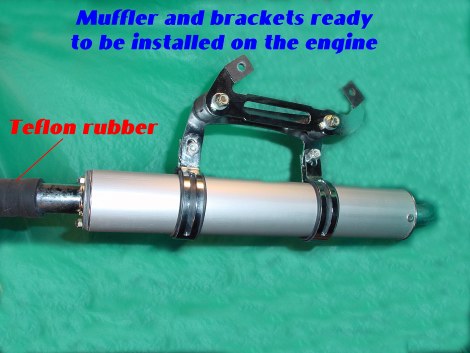
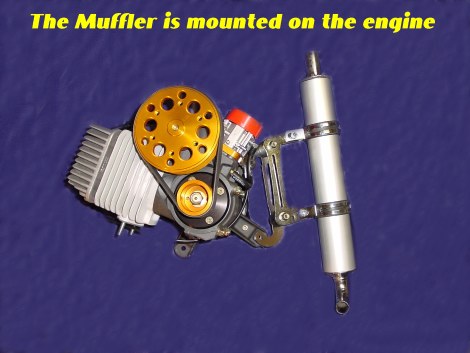
The picture above shows the muffler installed on the engine.
The upper end of the muffler shows the flange where the tuned pipe will be inserted.
Since the topic of this article was the correct assembling of the brackets, we did not discuss the correct installation sequence of the whole exhaust system.
If needed, this will be presented soon on this page.
Very briefly, here is the correct sequence:
1) Install the exhaust gasket over the exhaust port. To ensure a very good fit, a High Temperature HONDABOND compound or other high temperature silicone compound can be used on both sides of the gasket. This will also insure that upon removal, the gasket will detach freely and can be reused if covered again with high temperature silicon.
2) Install the exhaust manifold on the gasket and tighten the two # 13 nuts.
3) Connect the tuned pipe with the exhaust manifold.
Before installing this element, please apply a thin coat of ANTISEIZE lubricant on the ball joint to ensure good lubrication and prevent leakage.
4) Install the tree (3) springs to ensure a tight fit of the ball joint.
5) Install the black or transparent Teflon tube over the flange of the muffler (as shown in the pictures above.
6) Adjust the height of the muffler (loosening the two bolts of the round brackets with the rubber inserts) so when sliding it upwards on the tuned pipe, the tuned pipe will make FULL contact with the bottom of the flange. Using a high temperature HONDABOND or other high temperature silicone compound on the tuned exhaust's end pipe, will ensure a tight fit and will also provide cushioning between the two metal parts (the flange and the tuned pipe)
7) Once all parts fit, tighten the two nuts of the round muffler brackets, install two wire ties at the end of the black or transparent silicone tube already installed on the muffler and tuned pipe end.
Please make sure the springs that hold the exhaust manifold and the tuned pipe are secured with safety wire.
We also recommend using double springs on this connection as shown below.
Although this is not required by the manufacturer (JPX Italia Cors-Air Motors) we find this feature an extra safety measure.
Upon request from end users,we can publish more pictures and illustrate the installation of the exhaust manifold, tuned pipe and muffler.
Alex Varv